Unlock the Secret to Simple Smoked Pulled Pork Perfection
There's an undeniable magic to smoked pulled pork - Article 1: the aroma that wafts from the smoker, the anticipation of tender, smoky strands, and the pure satisfaction of serving a dish that consistently wows a hungry crowd. While many assume achieving such BBQ excellence is a complex affair, we're here to reveal a surprisingly simple, fuss-free approach that consistently delivers mouth-watering results. Forget the endless spritzing, injecting, or complex wrapping techniques – this guide is all about harnessing classic BBQ principles with minimal effort to create intensely flavorful, fall-apart tender smoked pulled pork.
This isn't just a recipe; it's a comprehensive guide designed to equip you with the knowledge and confidence to tackle your first pork butt, or to refine your existing technique. We'll delve into understanding the ideal cut of meat, the power of a good rub, and the art of 'low and slow' smoking, ensuring every bite is a testament to authentic, delicious barbecue.
The Foundation: Understanding Your Cut of Pork
The journey to phenomenal smoked pulled pork begins with selecting the right cut of meat. The star of our show is universally known as a pork butt, or sometimes labeled a Boston butt roast. Confusingly, despite the name, this cut doesn't come from the rear of the pig. Instead, it's sourced from the upper portion of the pig's shoulder, a hardworking muscle group that is rich in flavor and connective tissue.
Other labels you might encounter, such as a pork shoulder or picnic roast, can also be used, though the Boston butt is generally preferred for its higher fat content and more uniform shape, making it ideal for smoking. This particular cut is packed with overlapping muscle groups bound together by significant amounts of tight connective tissue and marbling. If you were to simply slice and serve it like a steak, it would be incredibly tough and chewy.
However, this very characteristic makes it perfectly suited for the low and slow smoking process. Over many hours at a gentle temperature, the fat renders, basting the meat from within, and more importantly, the tough collagen in the connective tissues slowly breaks down into gelatin. This transformation is what creates those incredibly tender, succulent strands of pork that are the hallmark of perfectly pulled pork. Without this lengthy, patient cooking method, you simply wouldn't achieve that melt-in-your-mouth texture.
Pro Tip: When selecting your pork butt, look for good marbling – small flecks of fat distributed throughout the muscle. This intramuscular fat will render during cooking, contributing to a juicier, more flavorful final product.
Mastering the Minimalist Approach: Ingredients and Prep
One of the most appealing aspects of this method is its surprising simplicity. You truly only need a handful of core elements to achieve extraordinary flavor, echoing old-school BBQ techniques. Forget complex brines, injections, or special sprays. The magic happens with just three main components that lay the groundwork for a truly authentic experience:
- A Quality Pork Shoulder (Pork Butt): As discussed, choose a well-marbled bone-in pork butt. The bone itself helps conduct heat and adds an extra layer of flavor and moisture.
- Your Signature BBQ Rub: This is where a significant portion of your flavor profile comes from. A good BBQ rub, often brown sugar-based, provides a fantastic crust (the "bark") and infuses the meat with a balance of sweet, savory, and subtly spicy notes. A classic blend often includes brown sugar, smoked paprika, garlic powder, onion powder, and a touch of cayenne pepper for a gentle kick. You can either use a trusted homemade recipe or a high-quality store-bought option.
- Quality Smoking Wood: While not typically found in your pantry, the wood you use is an essential "ingredient" that imparts that irreplaceable smoky character. Different woods offer distinct flavor profiles:
- Hickory: A classic choice, offering a strong, bacon-like smoke flavor.
- Apple/Cherry: Milder and fruitier, perfect for a subtle sweetness.
- Oak: A medium-strength smoke, versatile and pairs well with pork.
Preparation is Key to Success
Preparing your pork butt is straightforward:
- Pat Dry: Before applying any rub, thoroughly pat the pork butt dry with paper towels. A dry surface helps the rub adhere better and promotes a superior bark formation.
- Apply Rub Generously: Don't be shy! Apply your BBQ rub liberally over every surface of the pork butt. Gently pat it into the meat to ensure good adhesion.
- Allow to Set: For best results, once rubbed, allow the pork to sit at room temperature for 30-60 minutes before placing it in the smoker. This allows the rub to "sweat" into the meat, further enhancing flavor and bark development. Some pitmasters even rub the night before and refrigerate, allowing the flavors to meld deeper.
The Art of Low & Slow: Smoking Process and Temperature Control
The core philosophy behind truly tender smoked pulled pork is "low and slow." This isn't a race, but a marathon of patience and consistent temperature management. This simple method eschews wrapping, allowing for maximum bark development and smoke penetration.
Smoker Setup and Temperature
Preheat your smoker to a steady 225°F (107°C). Consistency is paramount here. Fluctuations in temperature can extend cook times or lead to uneven cooking. Once your smoker is stable, add your chosen smoking wood chunks or chips.
Understanding Cook Times and the "Stall"
A general rule of thumb for smoked pork butt is to estimate about 1.5 to 2 hours of cook time per pound of pork at 225°F. For example, an 8-pound pork shoulder could take anywhere from 12 to 16 hours. However, it's crucial to understand that these are just estimates.
Every piece of meat is unique, and actual cooking times can vary significantly. Factors like the specific fat content, shape of the roast, and even ambient weather conditions can influence the duration. Therefore, plan ahead and allow ample time, as rushing the process will compromise the final texture. It's not uncommon for an 8-pound butt to finish in 12 hours, while a 10-pounder might easily require 20 hours.
During the smoking process, you'll inevitably encounter a phenomenon known as "the stall." This is when the internal temperature of the pork butt plateaus, often between 150-170°F (65-77°C), and can remain there for several hours. The stall occurs due to evaporative cooling on the surface of the meat as moisture evaporates. While some pitmasters choose to wrap their pork during the stall to push through it faster, this simple, no-wrap method embraces the stall. By allowing the stall to run its course unwrapped, you facilitate the development of that beautiful, dark, crispy bark that is so desired in authentic BBQ.
Actionable Advice: Resist the urge to constantly open your smoker. "If you're looking, you're not cooking!" Every time you open the lid, you lose valuable heat and smoke, extending the cooking time. Trust your smoker and a good quality leave-in thermometer.
Achieving Pulled Pork Perfection: From Smoker to Table
Patience and proper finishing techniques are just as important as the smoking process itself for truly exceptional pulled pork.
Knowing When It's Done
Unlike some cuts of meat where doneness is determined by a specific temperature, pulled pork is about texture. While an internal temperature range of 195-205°F (90-96°C) is a good target, the ultimate test is "probe tender."
Insert a thermometer probe or a thin skewer into various parts of the meat. It should slide in with very little resistance, feeling like it's entering warm butter. If you feel any significant resistance, the connective tissues haven't fully broken down, and it needs more time on the smoker. Don't pull it off until it's probe tender – this is the key to fall-apart shreddability.
The Crucial Rest
Once your pork butt reaches probe tenderness, remove it from the smoker. This next step is non-negotiable for juicy results: resting the meat. Loosely tent the pork butt with foil (do not wrap tightly, as this can soften the bark) or place it in an insulated cooler. Allow it to rest for at least 1-2 hours, and ideally up to 3-4 hours. During this resting period, the muscle fibers relax, allowing the juices to redistribute evenly throughout the meat. Skipping this step can result in dry pulled pork.
Shredding and Serving
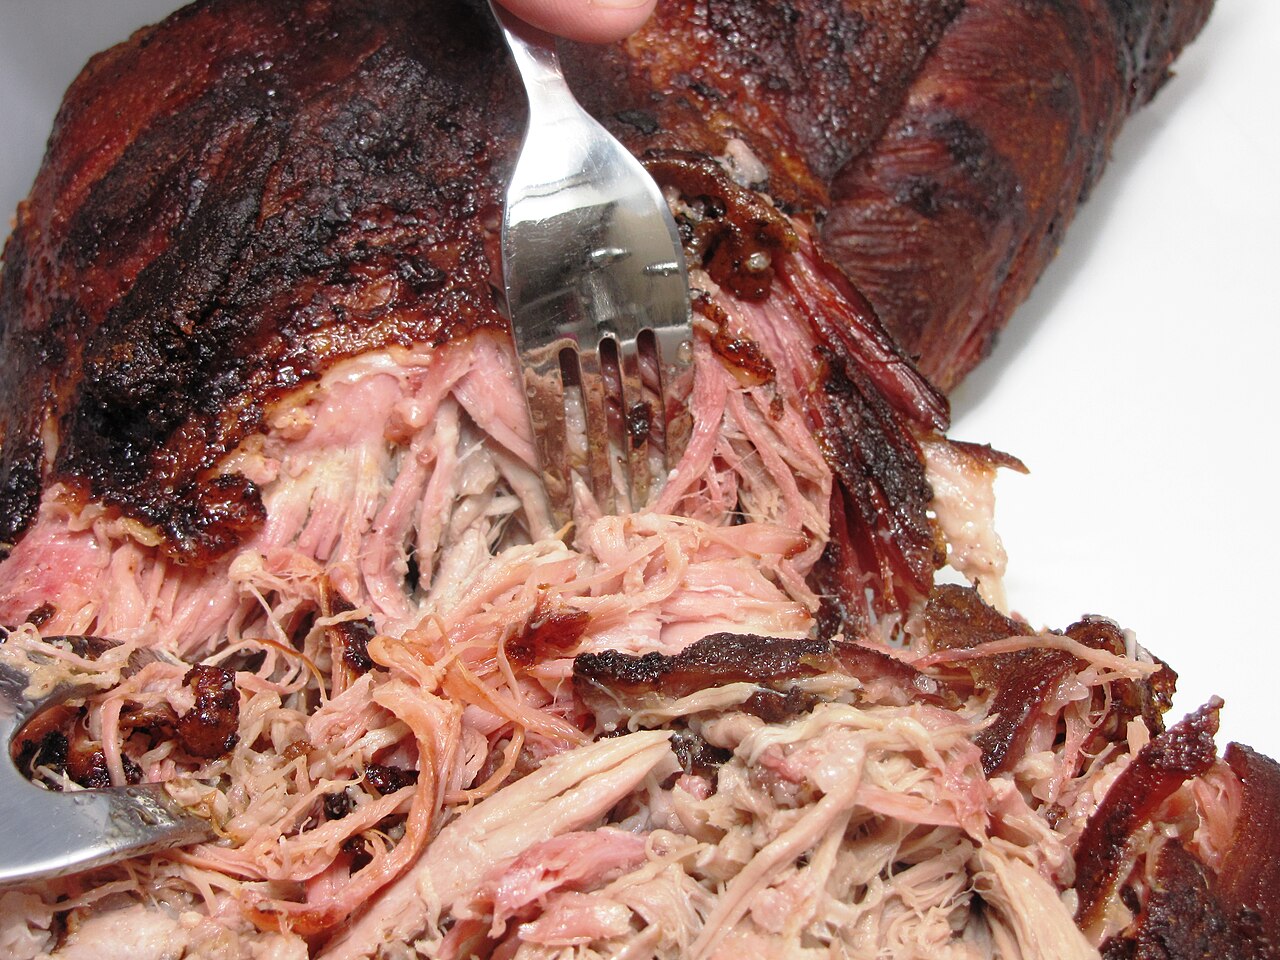
After resting, it's time for the satisfying act of shredding. The pork should be so tender that the bone easily pulls clean out. You can use two forks, meat claws, or even clean, heat-resistant gloves to pull the pork apart into succulent strands. Remove any excess fat, but don't be afraid to incorporate some of the rendered fat and crispy bark into the mix – it adds tremendous flavor and moisture.
Serve your smoked pulled pork hot on soft buns with your favorite BBQ sauce, coleslaw, and pickles. It's also fantastic as a topping for nachos, tacos, mac & cheese, or even in omelets. The possibilities are endless!
Mastering smoked pulled pork doesn't require complex techniques or a vast array of gadgets. By focusing on understanding your meat, applying a simple yet flavorful rub, maintaining consistent low and slow temperatures, and allowing for proper resting, you can achieve incredibly tender, smoky, and delicious results every time. This straightforward approach proves that classic BBQ principles, when respected, are all you need to create a truly memorable meal that will have everyone asking for seconds. So, fire up your smoker and prepare to enjoy the sweet, savory rewards of homemade smoked pulled pork!
